


Heating Installation in Castle Rock, CO
Keeping your home warm, safe, and energy-efficient during Castle Rock winters starts with the right heating installation. Whether you are replacing an old furnace, upgrading to a high-efficiency heat pump, or installing a new boiler, a professional approach ensures the system is correctly sized, code-compliant, and optimized for local climate conditions.
Why professional installation matters in Castle Rock
Castle Rock sits at higher elevation with cold, dry winters and occasional snow and ice. Those conditions affect system performance and design:
- High altitude can influence combustion and heat pump capacity, making accurate sizing and manufacturer derating essential.
- Dry winter air increases demand for indoor humidity control to protect comfort and wood finishes.
- Snow, ice, and freezing temperatures require attention to outdoor unit placement, freeze protection, and drain routing.
Proper installation reduces energy bills, extends equipment life, lowers safety risks (including carbon monoxide), and maintains manufacturer warranties.
Common heating systems for Castle Rock homes
- Gas furnaces (high-efficiency modulating or two-stage options)
- Cold-climate air-source heat pumps and ductless mini-splits
- Boilers (modulating-condensing for hydronic systems)
- Geothermal heat pumps (ground-source) for long-term efficiency gains
- Hybrid systems (furnace + heat pump) for balanced efficiency and reliability
Common heating installation issues in Castle Rock include incorrect sizing, insufficient combustion air at altitude, improper venting, inadequate duct sealing, and poor thermostat placement or programming.
Initial consultation and system selection
A thorough consultation includes:
- A home walk-through to assess square footage, insulation, window performance, attic and basement conditions, and existing ductwork.
- A heat loss and heat gain calculation (Manual J) to determine correct system capacity accounting for Castle Rock’s elevation and local climate.
- Review of fuel options (natural gas availability, electric rates), long-term efficiency goals, and indoor comfort preferences (zoning, humidity control).
- Recommendations on system type and efficiency levels suitable for your home and budget.
This stage also identifies any necessary upgrades: electrical service changes, gas line sizing, improved insulation, or ductwork modification.
Site preparation before installation
Preparing the site ensures a smooth, safe install:
- Clear access to equipment locations and work areas.
- Electrical panel space and circuit preparation for new equipment.
- Gas line mock-up and shutoff accessibility.
- Ductwork inspection and marking areas needing repair or extension.
- Outdoor unit placement planned for snow clearance and airflow, with a solid, level pad and consideration of prevailing winds.
Detailed site preparation prevents delays and protects existing finishes.
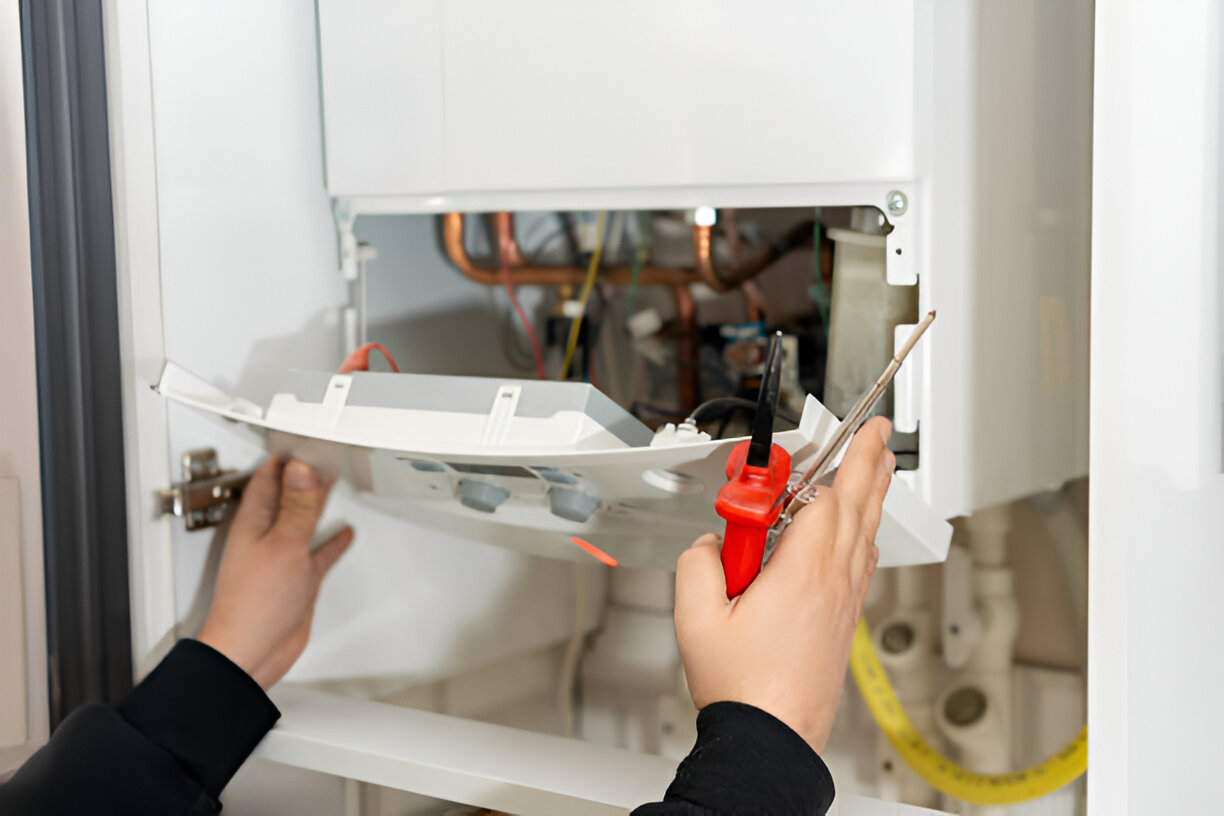
Typical installation steps
- Disconnect and remove the old equipment safely, including gas cap-off or electric disconnection.
- Prepare new equipment placement, level and secure the unit, and install mounts or pads for outdoor equipment.
- Connect gas lines or refrigerant lines, including brazing, pressure testing, and leak checks.
- Tie in electrical wiring and controls, including proper grounding and surge protection where required.
- Install or modify ductwork: sealing, insulating, and adding return/exhaust paths as needed.
- Set up venting and combustion air systems that comply with local requirements and account for altitude effects.
- Install thermostats and controls, including zoning dampers or smart thermostats if selected.
- Complete condensate and drainage piping with proper traps and freeze protection for exterior runs.
All connections are double-checked with manufacturer clearance distances, mounting requirements, and local code standards.
Safety and code compliance
Safety is paramount:
- Permits are typically required in Douglas County and surrounding jurisdictions; installations should include permit submission and coordination with local inspectors.
- Combustion safety checks and carbon monoxide testing are mandatory for fuel-fired systems.
- Proper venting and combustion air sizing at altitude to prevent spillage or incomplete combustion.
- Gas line sizing and pressure testing to code, and electrical work meeting local electrical code.
- Installation clearances and vent termination locations consistent with manufacturer instructions and local ordinances.
Following codes protects occupants and preserves manufacturer warranties.
Commissioning and performance testing
Commissioning confirms the system operates as designed:
- Pressure and leak tests for gas and refrigerant lines.
- Combustion analysis and CO measurements on gas appliances where applicable.
- Electrical load checks and startup sequence verification.
- Airflow measurement and duct leakage testing to ensure balanced delivery.
- Temperature rise testing across furnaces and delta-T checks for heat pumps and boilers.
- Thermostat calibration, zone balancing, and control verification.
- Performance documentation, including measured operating parameters and recommended adjustments.
A properly commissioned system delivers expected efficiency, comfort, and reliability from day one.
Expected timelines
- Initial consultation and estimate: 1 to 3 business days to schedule; on-site visit typically 1 hour.
- Sizing, equipment selection, and paperwork: 1 to 5 days depending on complexity.
- Permitting: typically 3 to 10 business days but can vary with local inspection schedules.
- Installation:
- Furnaces and heat pumps: commonly 1 to 3 days.
- Boilers and larger hydronic systems: 2 to 4 days.
- Ductwork replacement or major remodeling: add 1 to several days.
- Commissioning and handover: half day to one day after installation.
Seasonal demand (peak winter or early fall) can extend scheduling and permit timelines.
Post-installation support and maintenance
After installation you should receive operation instructions, equipment documentation, and information on warranty registration. Recommended post-installation care for Castle Rock homes includes:
- Annual tune-ups before heating season: combustion checks, filter replacement guidance, airflow cleaning.
- Regular filter changes (frequency depends on filter type and household conditions).
- Humidity control strategies during dry winters, including whole-home humidifiers if desired.
- Snow and ice management for outdoor units and proper elevation of pads.
- Periodic inspection of vent terminations, condensate lines, and duct seals.
Proactive maintenance maintains efficiency, prevents emergency failures, and helps preserve warranty coverage.
Benefits of a properly installed heating system in Castle Rock
- Reliable comfort during cold nights and extended winter periods.
- Optimized performance and lower energy costs through correct sizing and commissioning.
- Enhanced safety with proper combustion setup and CO monitoring.
- Longer equipment life and fewer unexpected repairs.
- Better indoor air quality from sealed ducts and appropriate filtration.
A professional heating installation takes local climate, altitude, and home characteristics into account to deliver safe, efficient heating tailored to your Castle Rock home.

Customer Testimonials

The team at Signature Heating & Air did an excellent job with our new AC installation. They were professional and timely from the onsite quote to the final installation. Their attention to detail was top notch and I highly recommend anyone to give them a call.

I had a very positive experience with all the folks at Signature! Very professional, knowledgeable and honest. They installed a new A/C unit and kept my place clean and they worked with precision and efficiency. Highly recommend them!
I called Signature Heating & Air this morning for a relatively simple job of installing an Ecobee smart thermostat. Quentin came right on schedule and handled it efficiently. He was very helpful and patient to show me how the thermostat worked, etc. Thanks again! I highly recommend this company.
Timely, professional and reasonable pricing. They just replaced both my AC and furnace in about 4 hours. Cleaned up and all is running smoothly. I recommend and will use again when needed.
Steve was great and very professional. He came out and got my HVAC running the same day that I called. I will be using him and his company for my any furnace and AC problems and maintenance.


.webp)
Buy Today, Pay Over Time
Wisetack - 0% APR up to 24 months (on approved credit)